


Story:
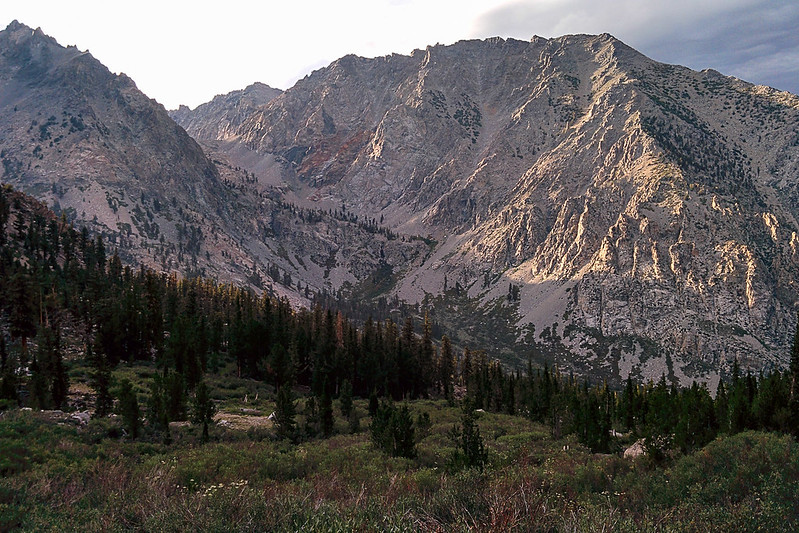
On Saturday morning, I drove up to Onion Valley—about a four-hour drive. Just as I was about the pay the $18 campground fee for an open spot, the manager came by and said that, despite the posted signs, everything was reserved except for one walk-in site. Since it was a very long walk-in (with no associated parking spot on the loop), I decided just to park for the night in the hiker's parking lot (free!).
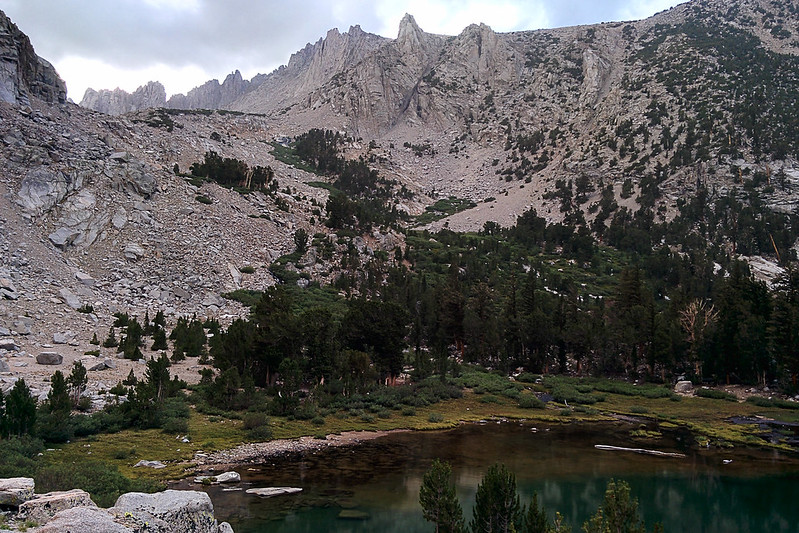
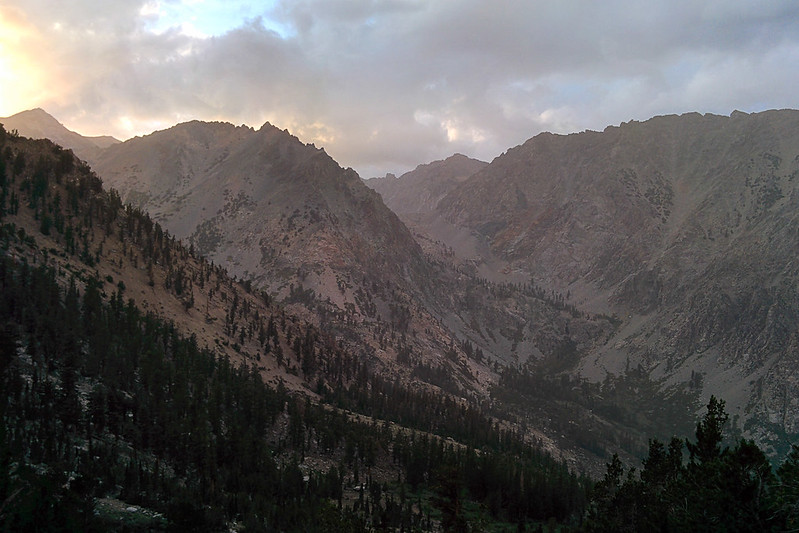
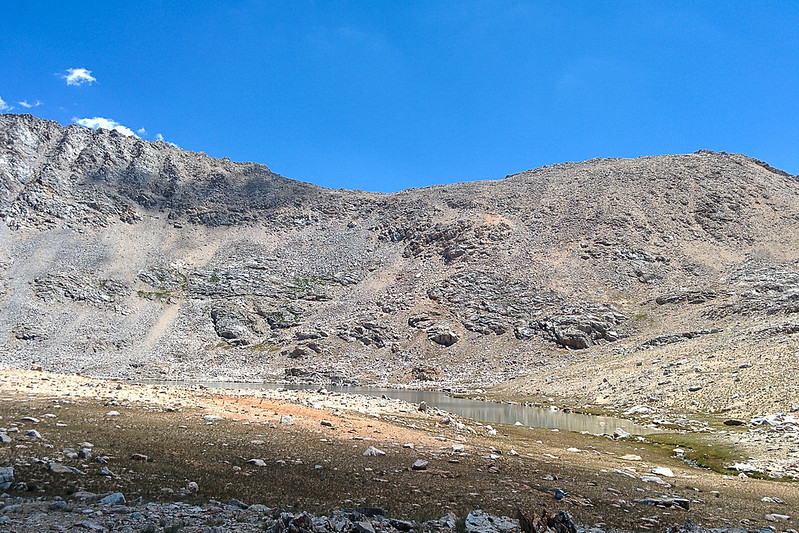
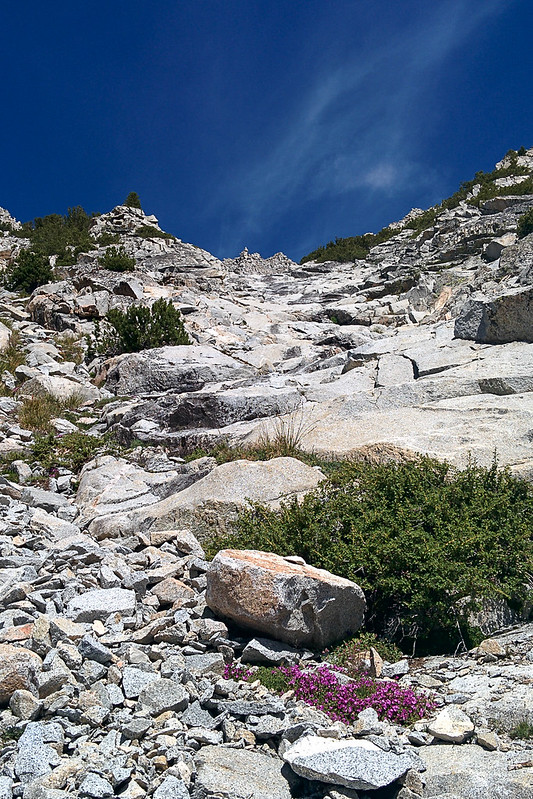
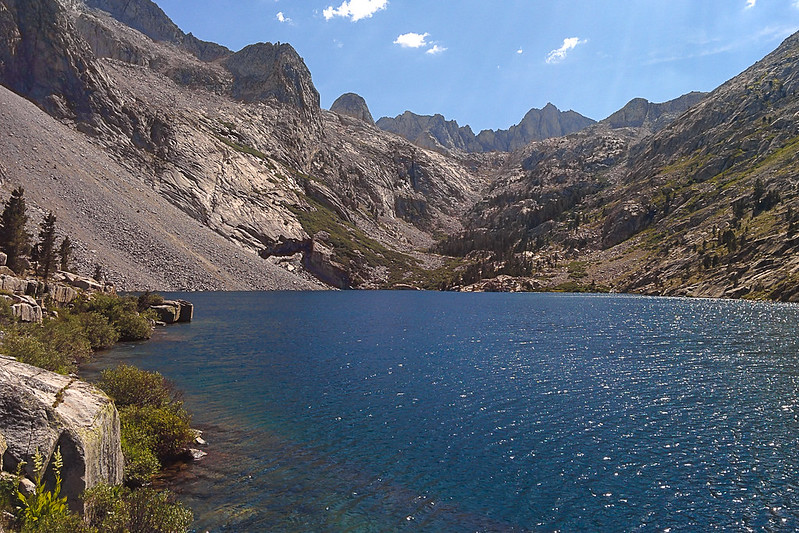
The weather was not looking good. The forecasts had been getting steadily worse over the week, reaching 50% chance rain Saturday and 30% chance Sunday. But the campground manager said that the rain had been passing them by. To get a sense for the next day's trail, I went hiking up to Robinson Lake—but was turned back after only 1/3 mile, when the showers finally let loose. I'd thought that I'd forgotten my umbrella at home (though it might just have been packed away somewhere). I read in my car. The rain didn't last too long, so a little later I went out for a second try. This time, I barely got out of the parking lot. I made a final attempt at about 6pm, and made it up to the lake (1.4 miles away, ~10,600' elevation versus 9,200' at the campground) with enough light for photography. Robinson Lake is beautiful! Back at my car, the rain started again, and it would rain off and on until about 10pm.
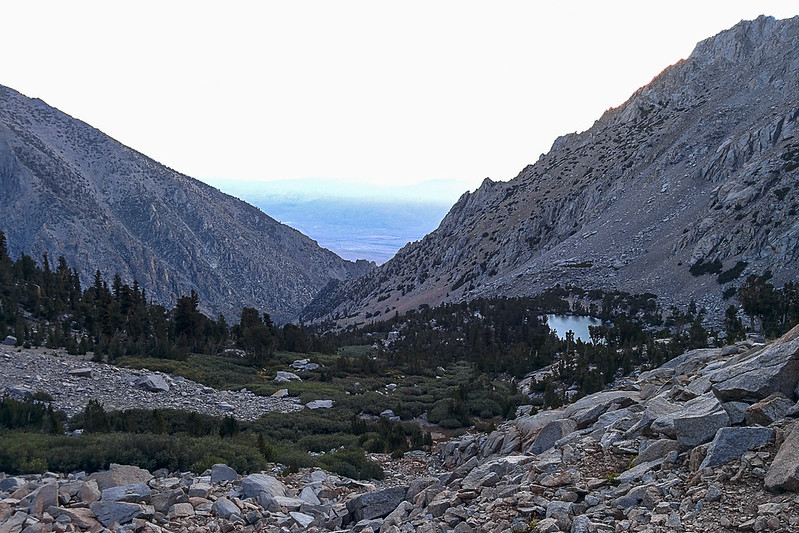
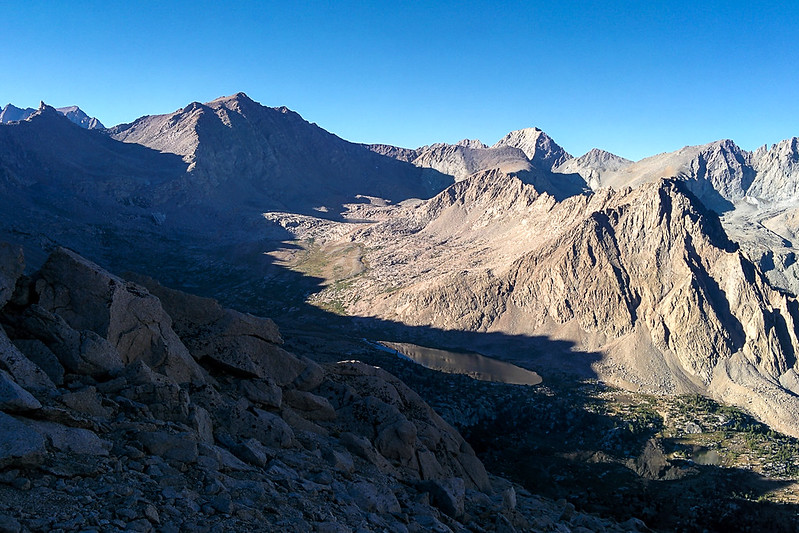
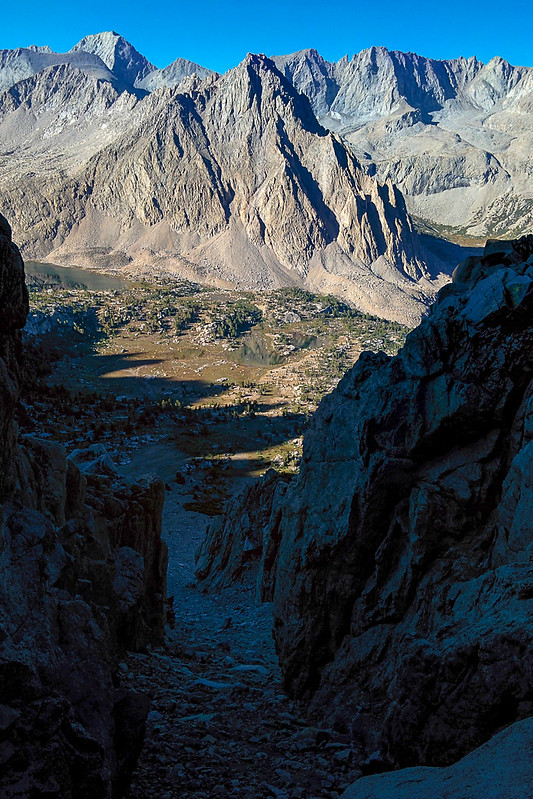
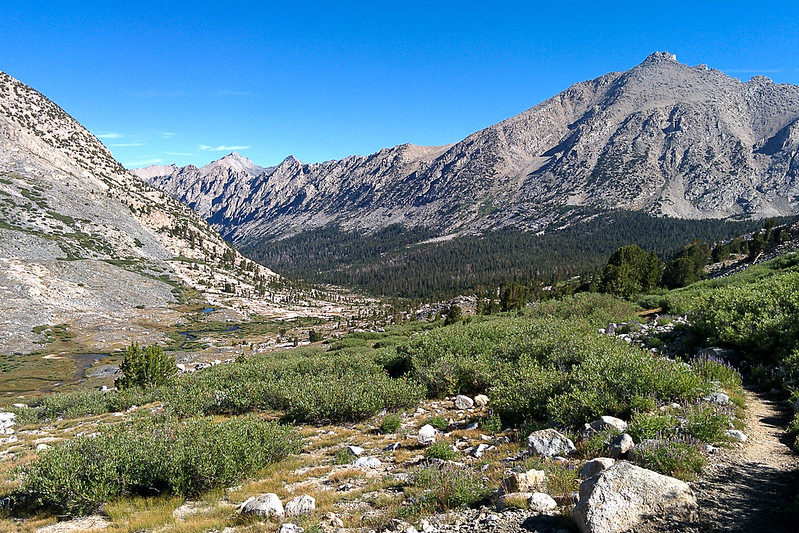
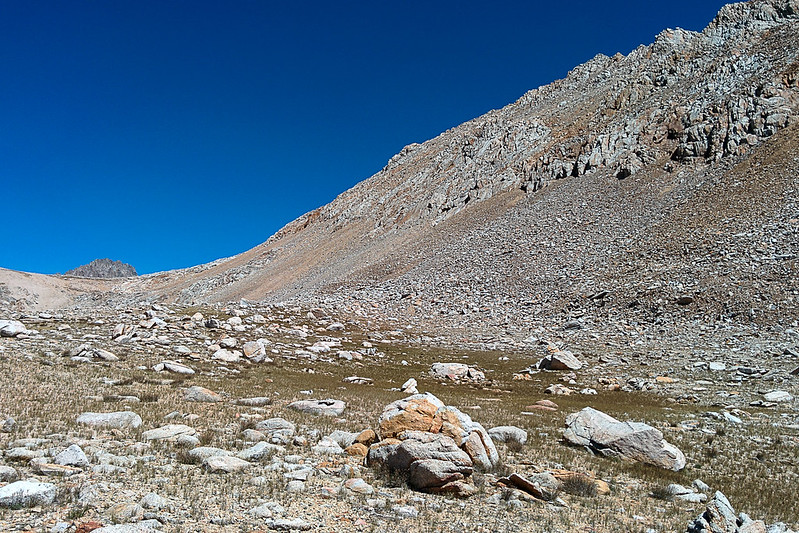
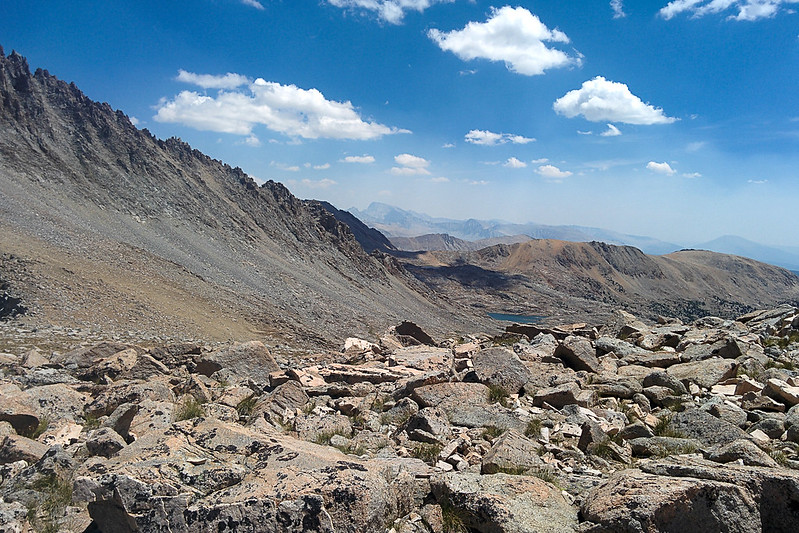
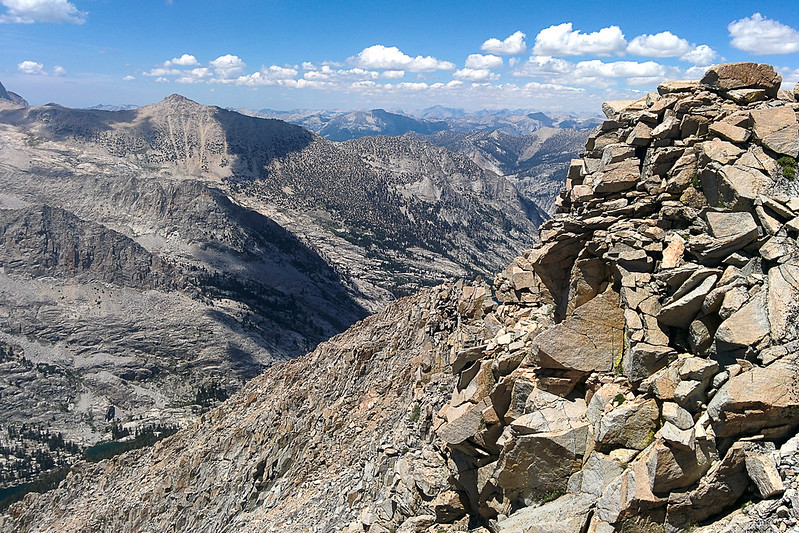
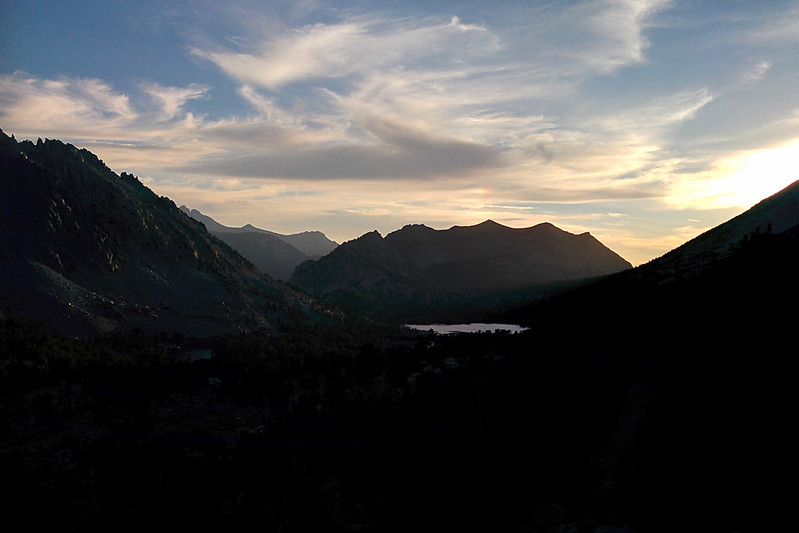
Looking down toward Onion Valley

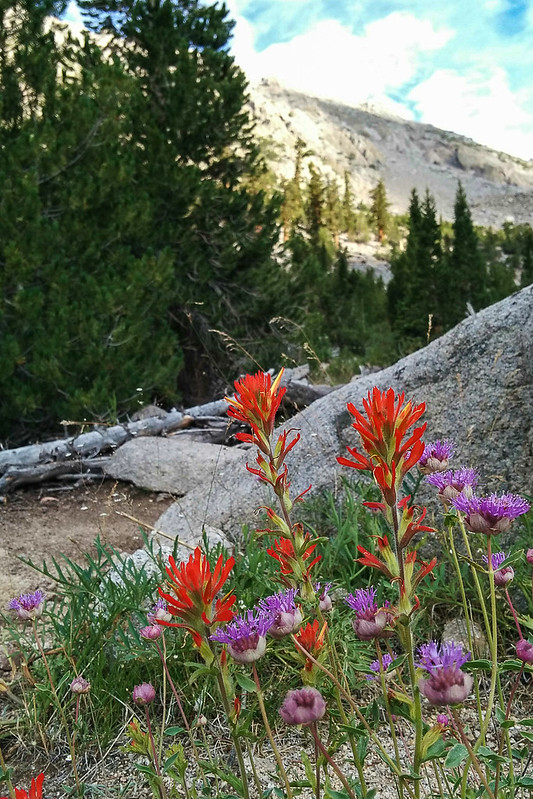
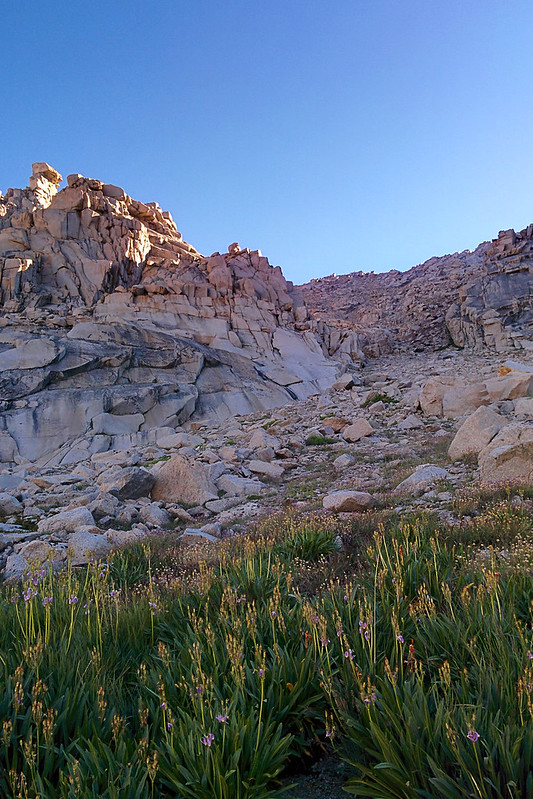
Flowers along the trail to Robinson Lake

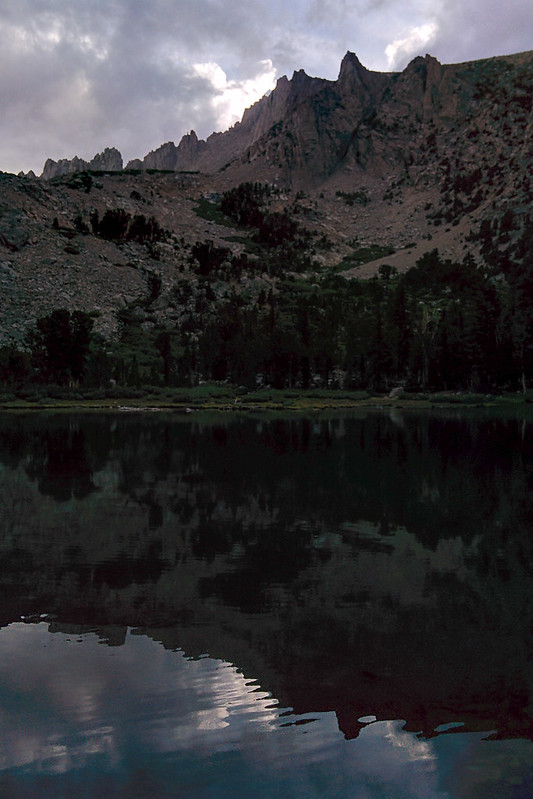
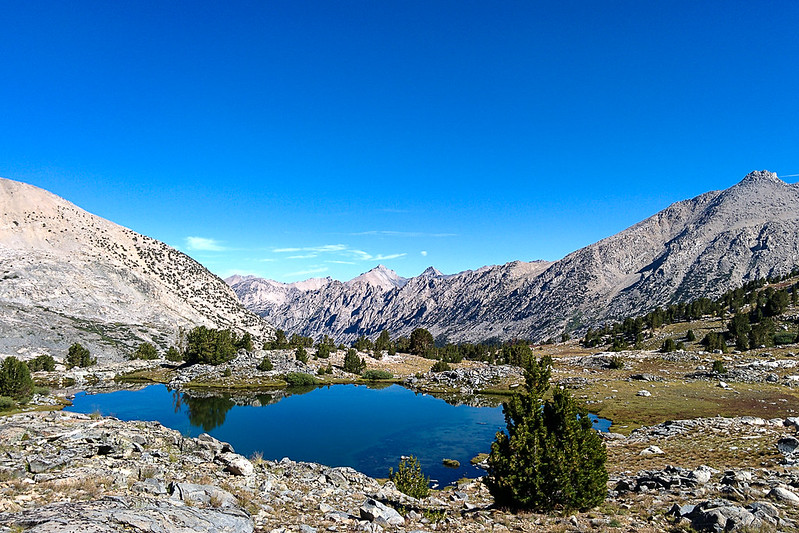
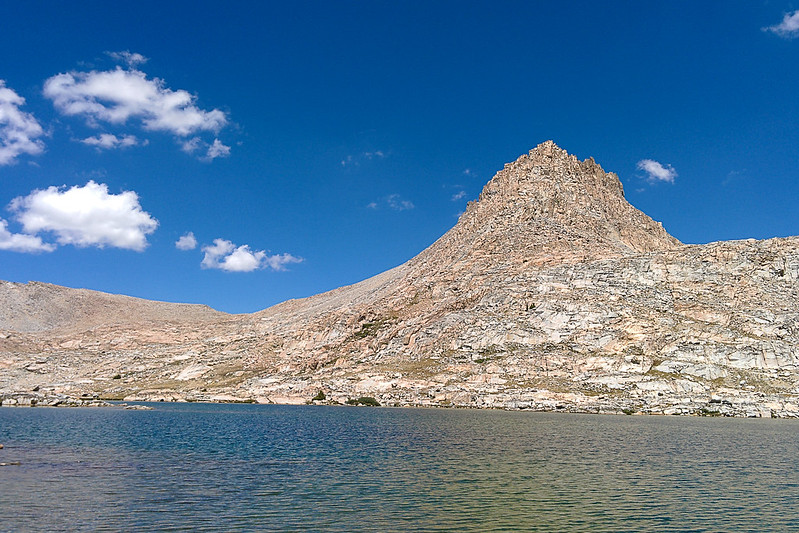
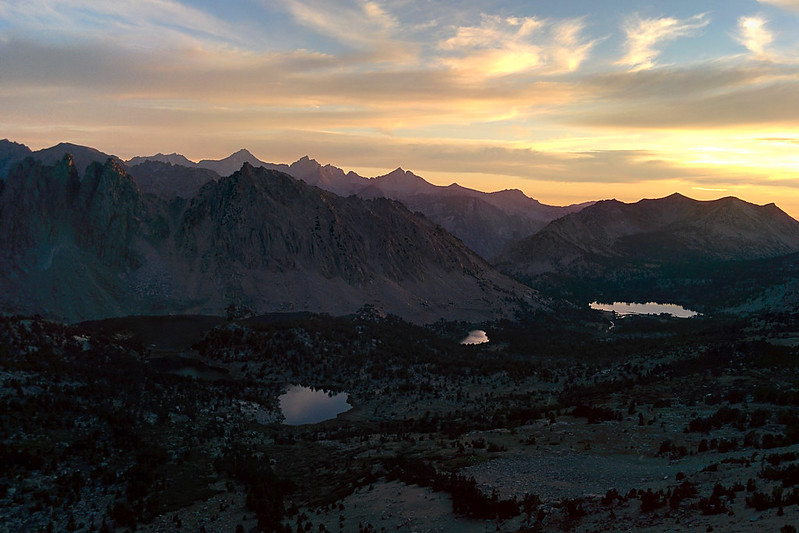
Robinson Lake


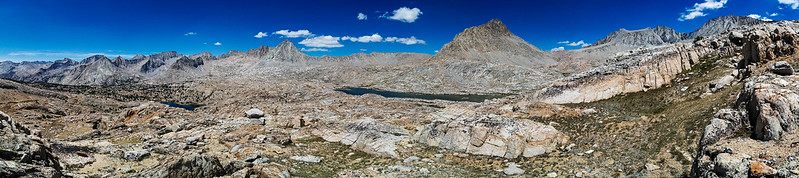
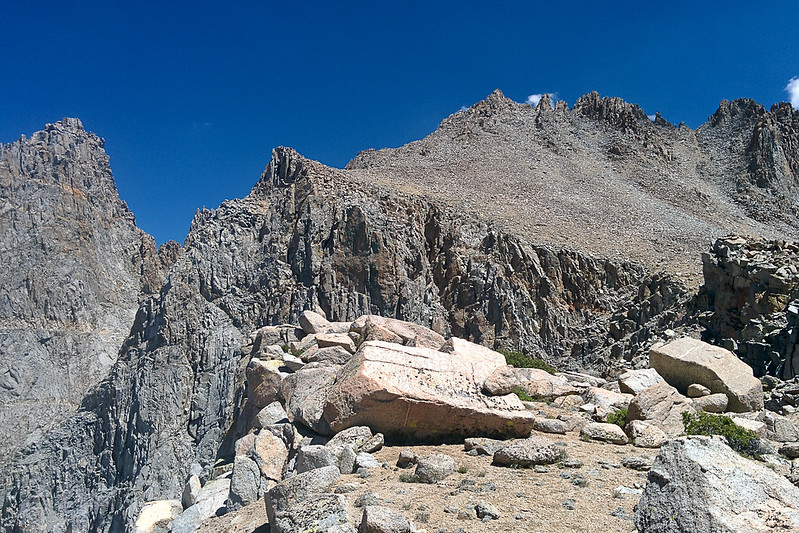
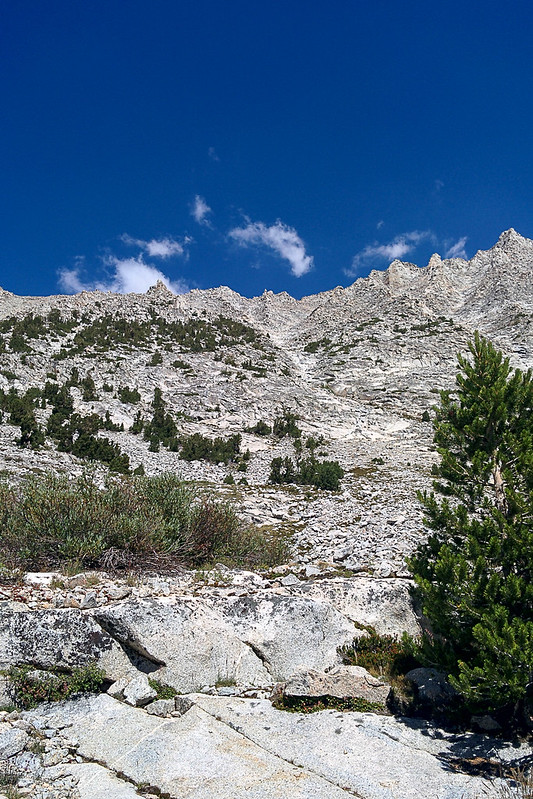
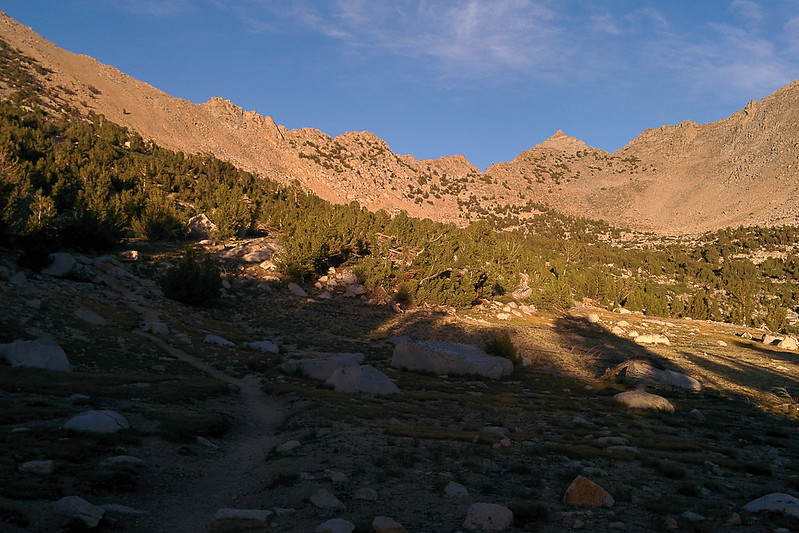
This gives a decent view of the way up to the bowl below University Pass.


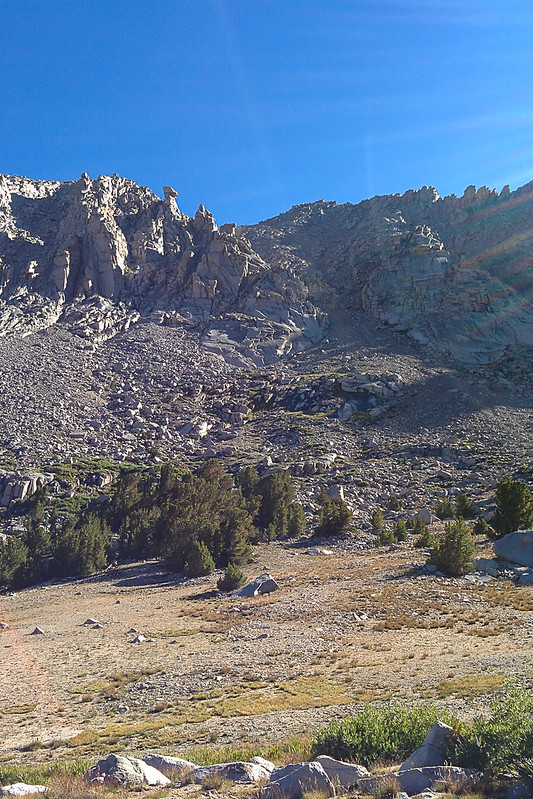
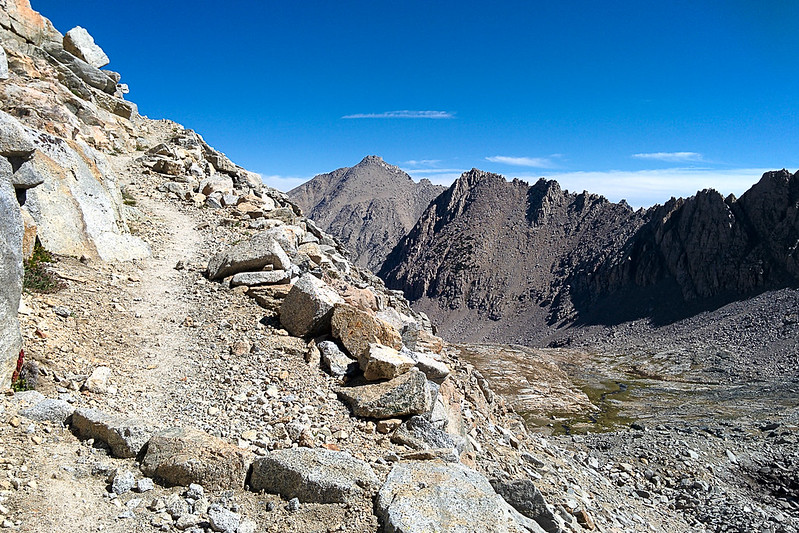
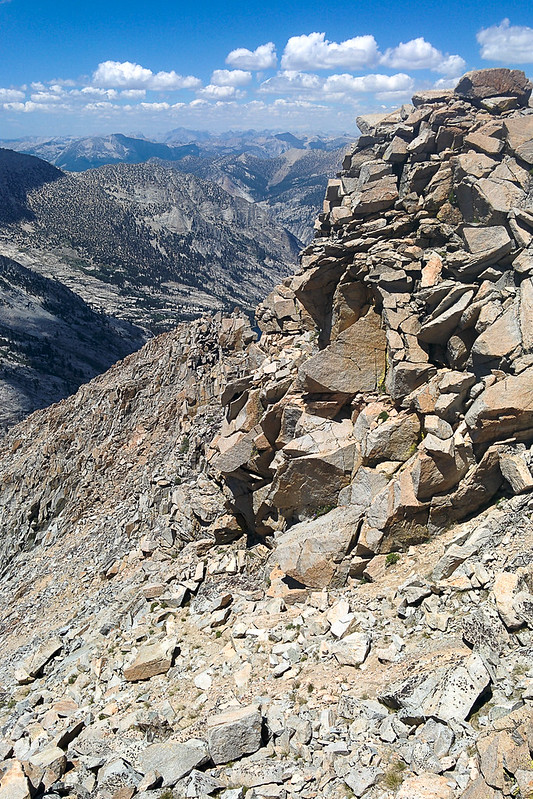
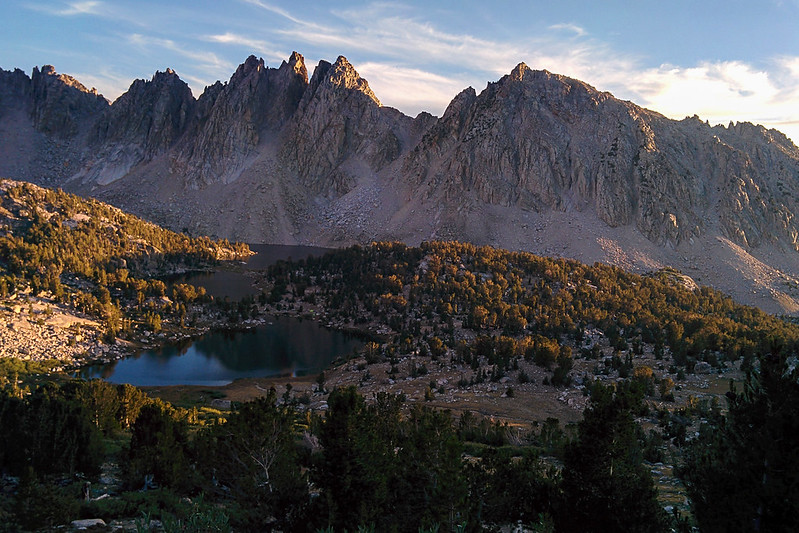
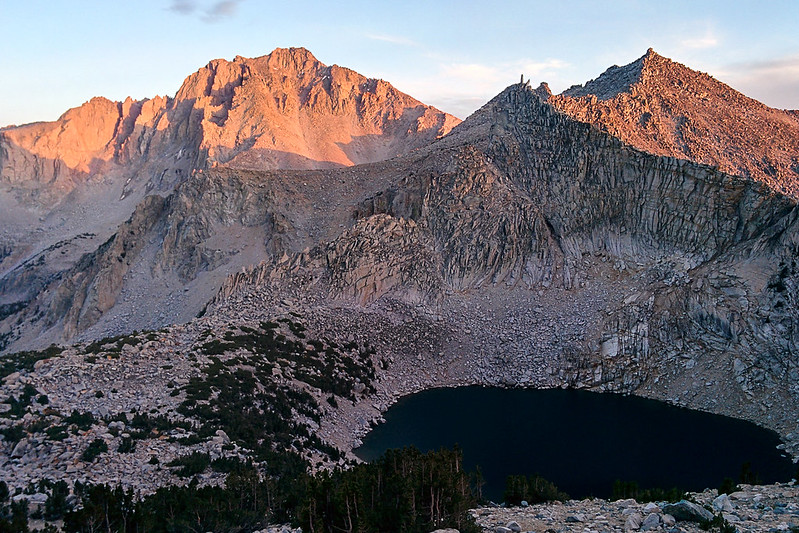
Ridgeline SE of Robinson Lake


Looking down toward Onion Valley

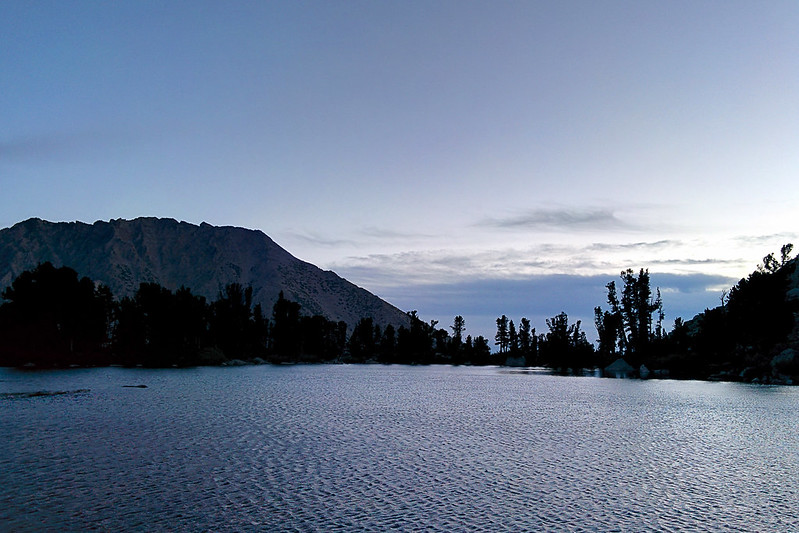
I got to bed at about 10:30, and got up at about 4am. I started running at 5:20, when there was enough light to move.
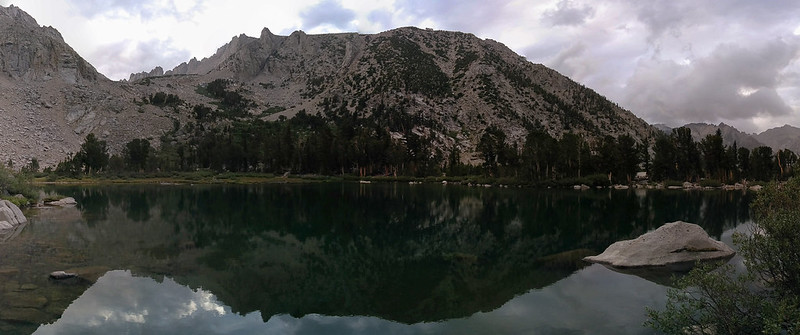
Robinson Lake in the morning


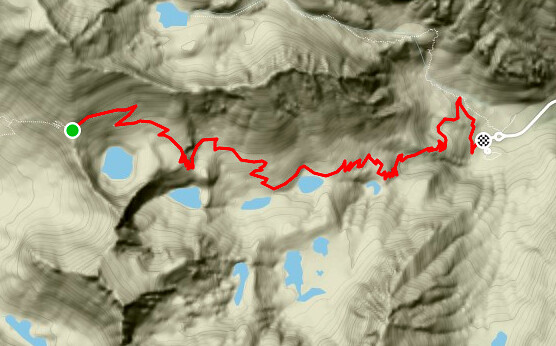
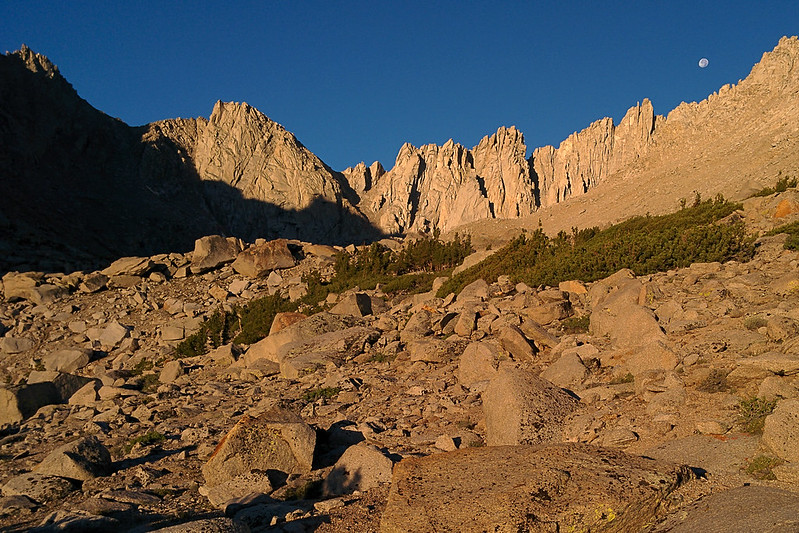
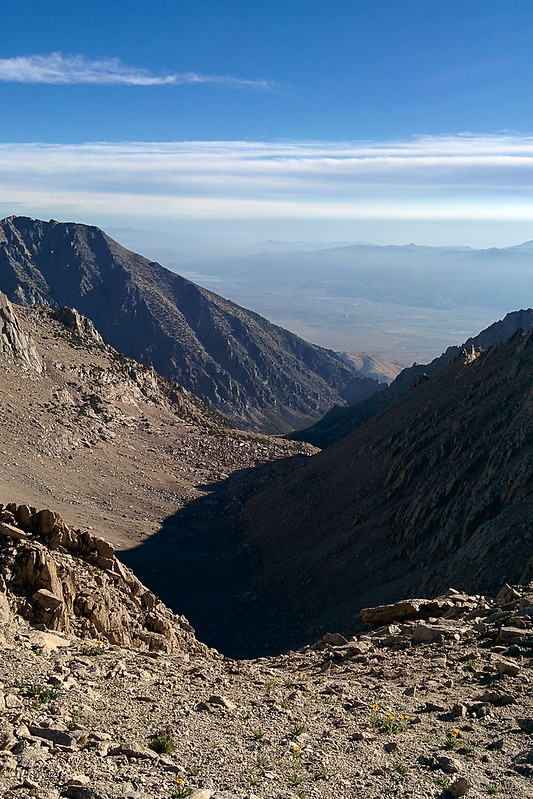
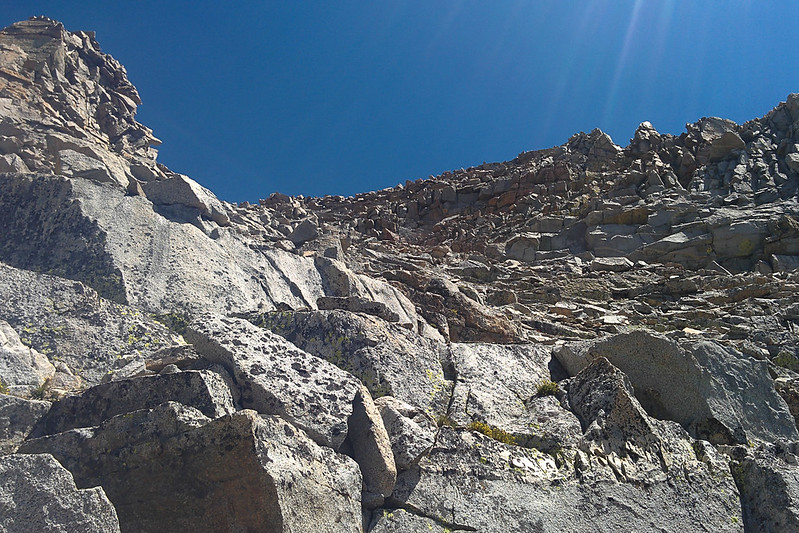
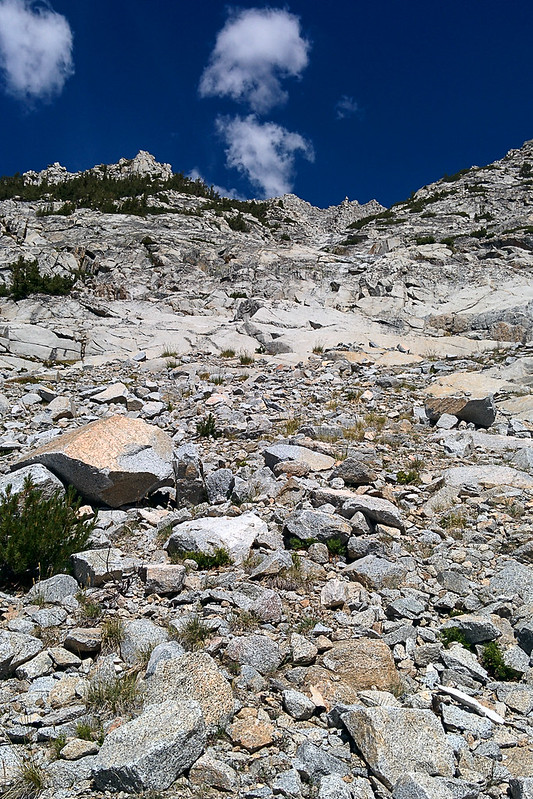
The climb up to University Pass was honestly scary. I had been uncertain about the pass; Secor says, "Only experienced cross-country hikers should attempt it." What does this mean? (Maybe if you have to ask…) The route-finding above Robinson Lake was straightforward. At the lake itself, I went up through the brush instead of sticking closer to the cliff band on the left, a minor mistake. Higher up, though, the route just opens up. There is a bowl about 1000' higher than the lake, and then the pass is about 1000' above that (12,640'). The problem is that, while the rocks were dry, the dirt in the pass was wet. I had to be very careful near the top. The ridge just to the left of the pass was shedding rocks, dropping shrapnel through the top 200' of the route. I had to drop and cover several times while rocks spun right over me. A rock bashed my head pretty hard. But not a falling rock! I was just too aggressive in standing up again from under an overhang.
I reached the pass at around 7:40. There, I took in the view of Center Basin, watching the shadows creep in retreat left across the lakes.
I also put on my sun sleeves and jacket for warmth; the south side was all in the shade, and windy. It was an easy descent, though, mostly stepping through scree. At one point, the chute narrows to go through a cliff band, and here I had to climb over one rock. That's it, for the whole descent.
Setting moon and basin below University Pass (the shadowed chute at left)

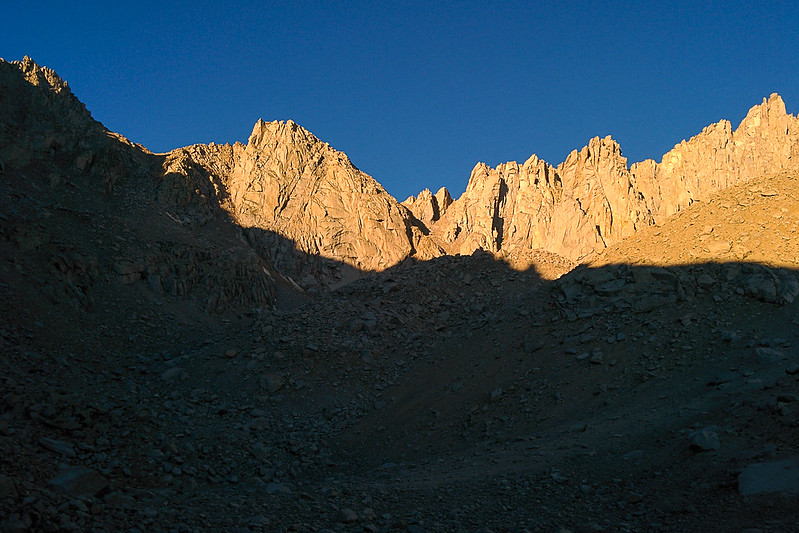
Sunlight hitting the top of the pass

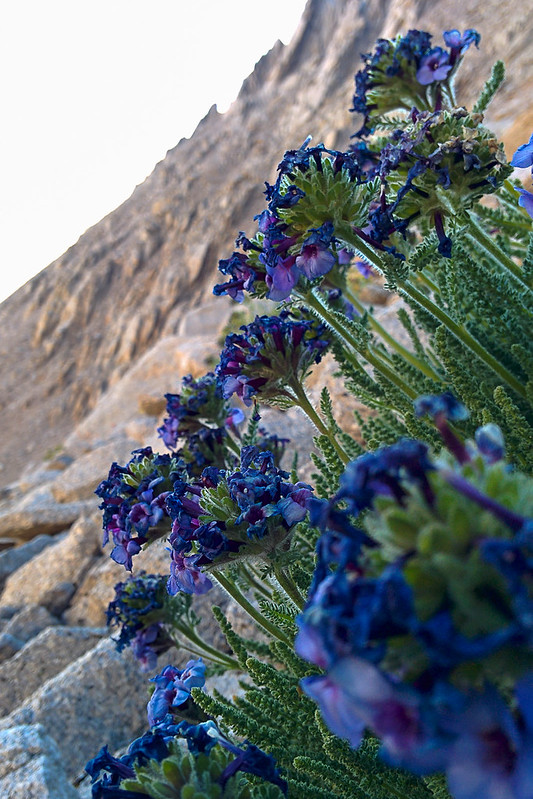
Sky pilot (Polemonium eximium) near University Pass

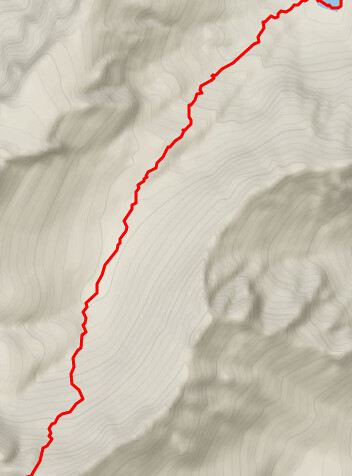
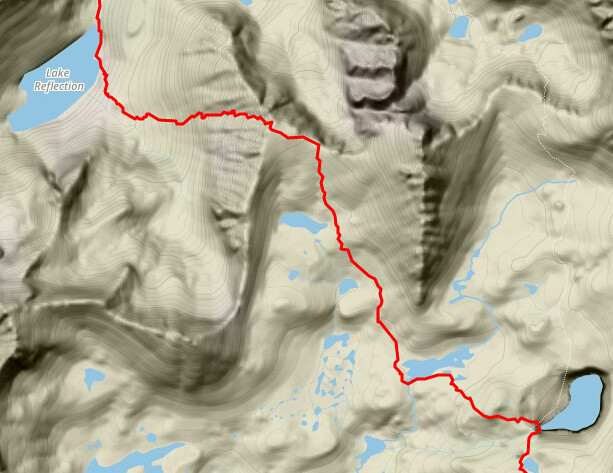
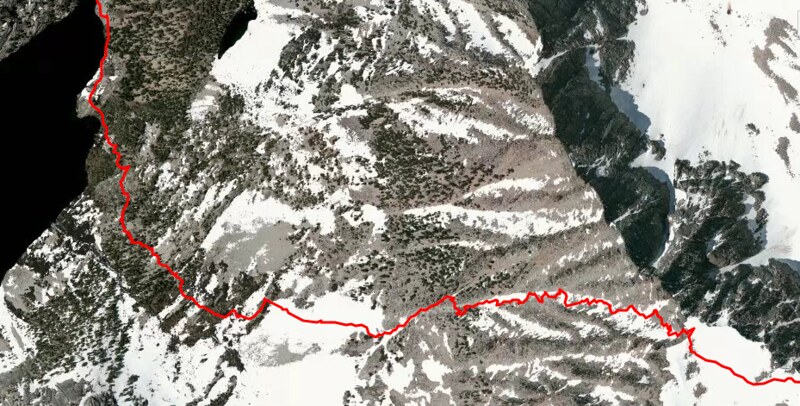
GPS route from Robinson Lake to University Pass

View N from University Pass

View S from University Pass

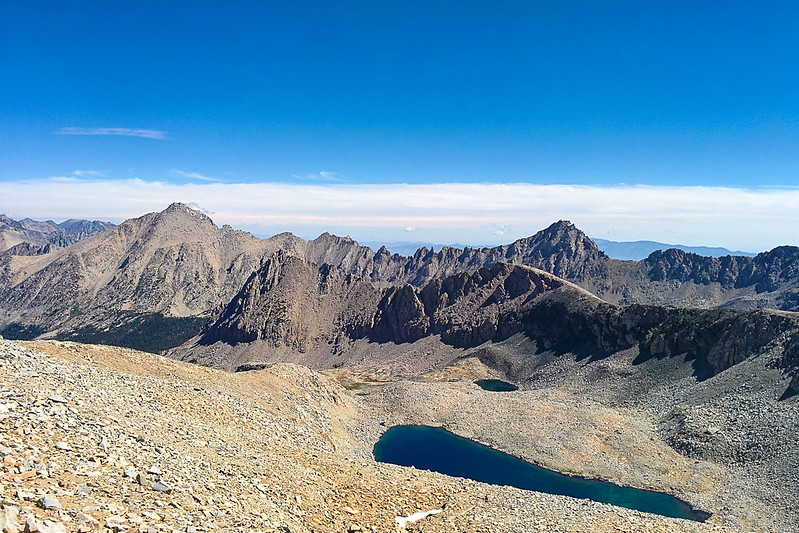
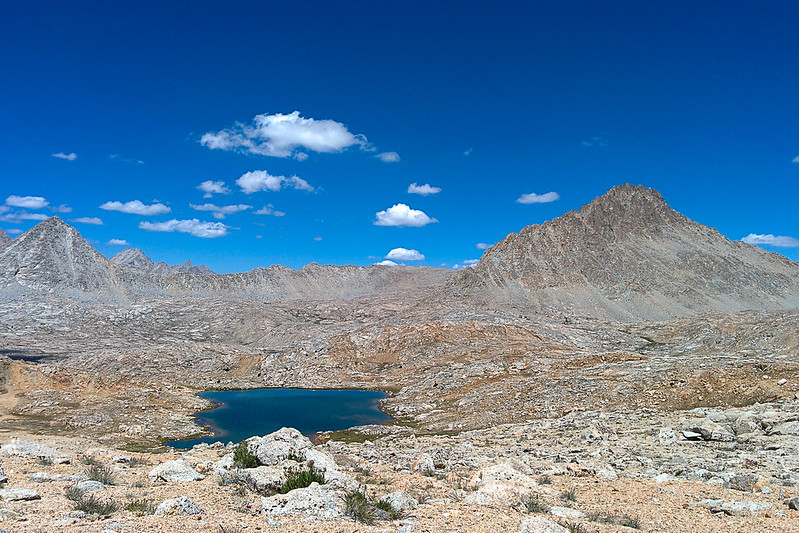
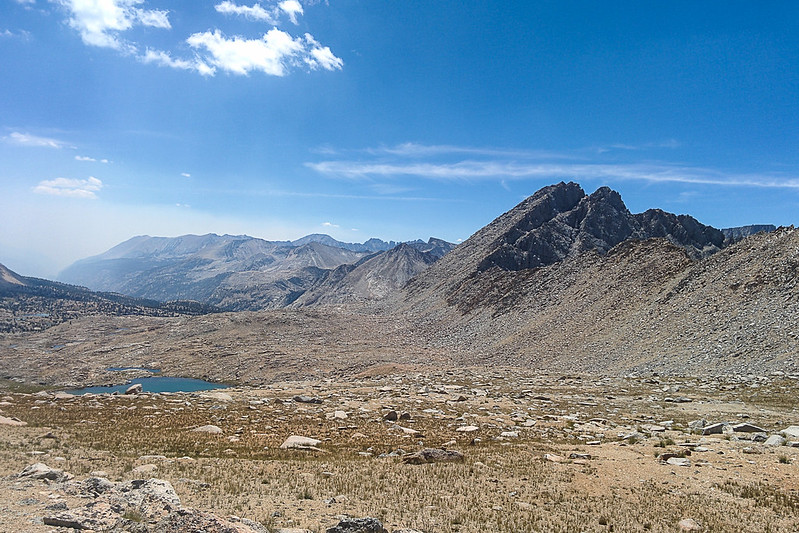
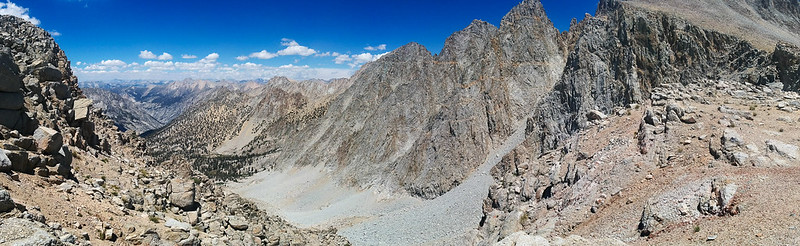
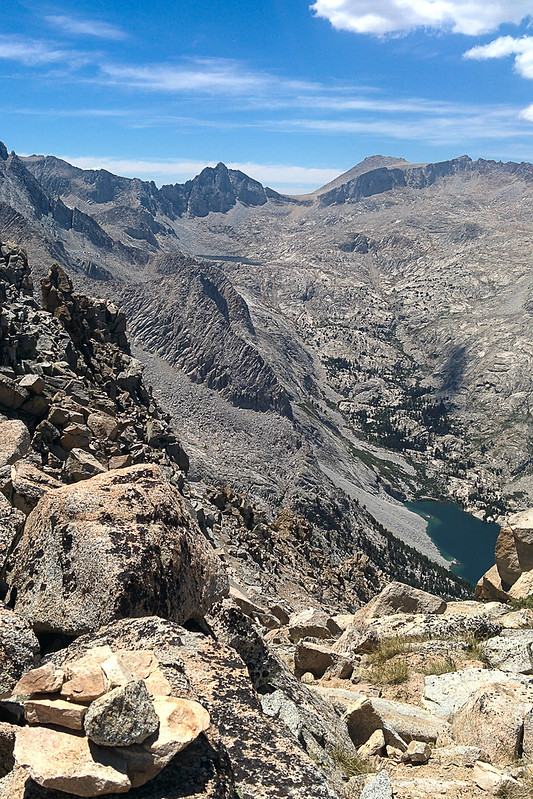
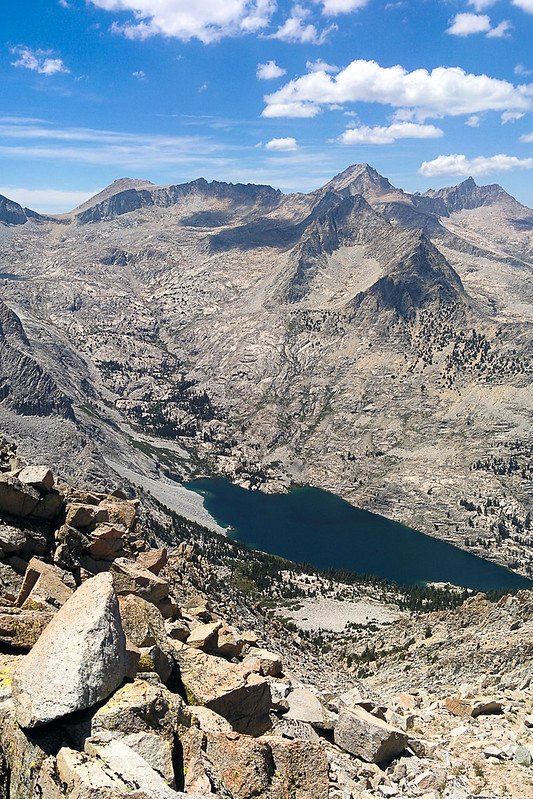
Center Basin from University Pass
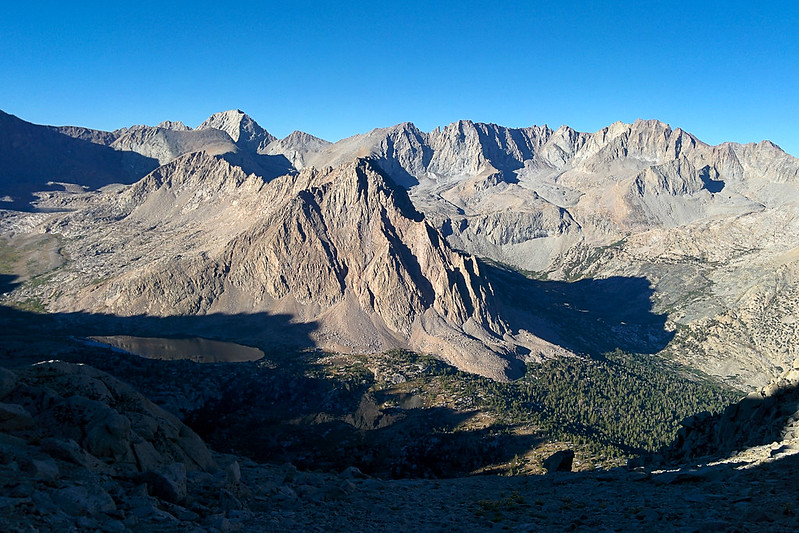
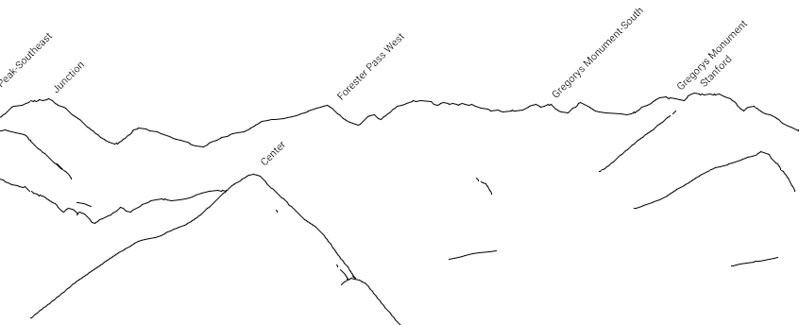
Center Basin is the shelf to the left, the JMT goes up the valley to the right. Center Peak is the central peak between the two. The highest peak on the horizon, to the left, is Junction Peak. Two dips to its right is Forester Pass, where I'm headed next. If you follow the moiraine up from the right side of the cliffs in the middle, you will see Mount Stanford (more info here: http://www.scaruffi.com/travel/stanford.html ).


Here's a labeled, simulated view from CalTopo: http://caltopo.com/view#ll=36.742,-118. ... 99,-123.57 (from http://caltopo.com/map.html#ll=36.74231 ... o=r&n=0.25 )

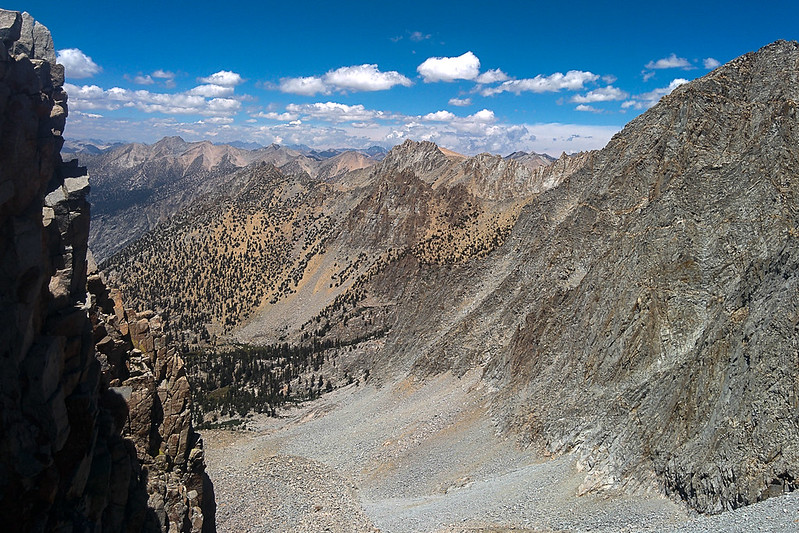
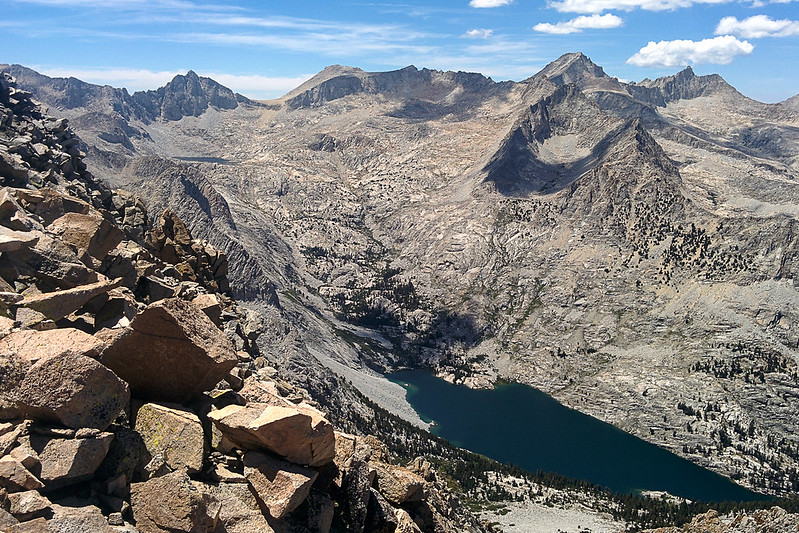
The end of Center Basin is dominated by Mt Keith

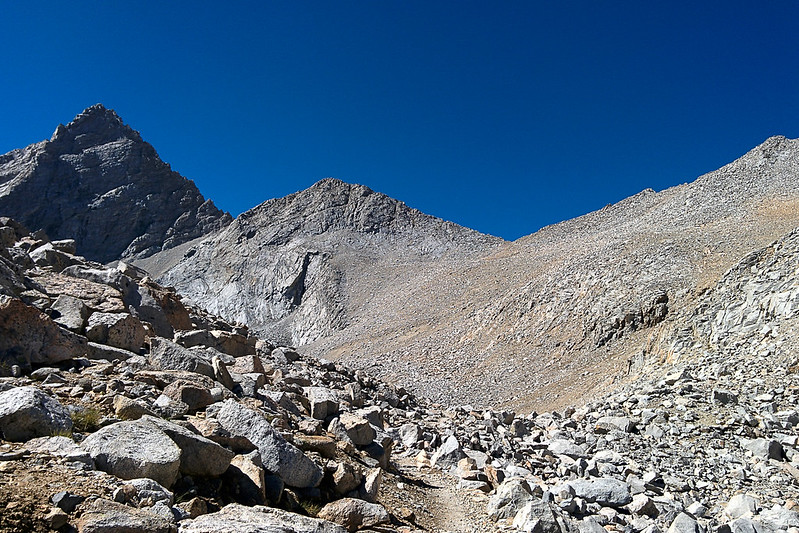
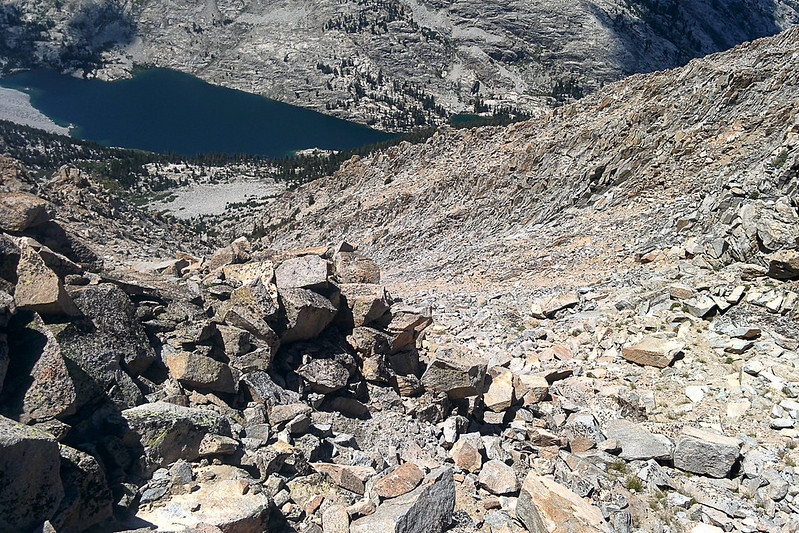
Chute below University Pass


GPS route down the pass, across Center Basin to the JMT


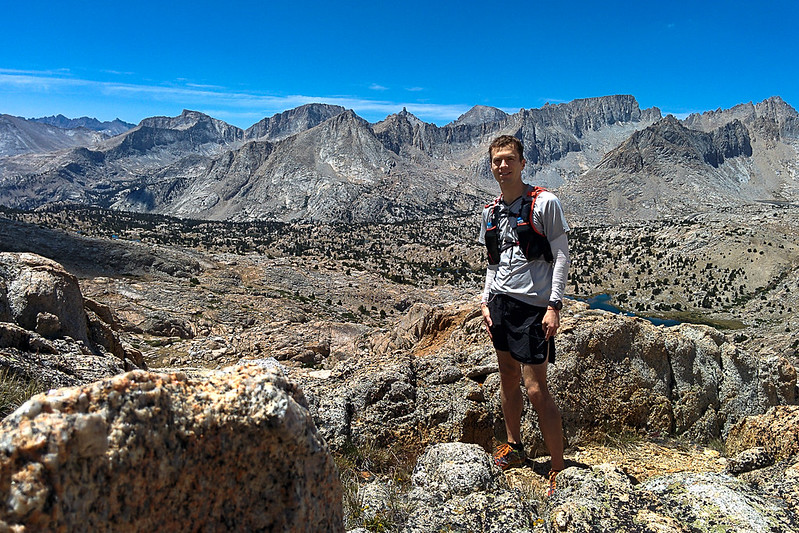
I reached Center Basin, and the whole area was so runnable that when I reached the trail I just kept on going by, hoping to shortcut around the slopes of Center Peak instead of losing altitude and distance on the Center Basin Trail to the JMT. As usual with these shortcuts, this was probably a mistake, as I soon got caught up in crossing lots of streams and then boulder fields. In fact, though, it wasn't so bad at all, and I was soon on the JMT headed to Forester Pass. I sat for a bit to dry my socks and shoes.
From my car to the JMT, I hadn't seen a single person, but going up to Forester Pass, people were everywhere. I enjoyed passing them all, headed up. It gives good motivation to keep running. I reached the pass at ~10:40am. Early for lunch, so I kept going.
University Peak (right) and Mount Rixter (center), along the JMT to Forester Pass


Approach to Forester Pass

On a switchback, looking S toward Center Peak

Center Peak (at the left end of the middle-distance ridge), University Peak (left of Center Peak), and University Pass (behind and just to the right of Center Peak)

Atop Forester Pass

Looking south from the pass, toward Kern Canyon and the Kaweahs (map link: http://caltopo.com/map.html#ll=36.69348 ... o=r&n=0.25 ). The JMT switchbacks down to the gentle valley floor.

The descent south of Forester Pass is very runnable, especially after the switchbacks at the top. I wasn't sure where to cut off trail to wrap around the ridge to Lake South America. My GPS track shows the route I chose. In fact, it didn't matter much that I was off trail, until I hit the ridgeline. Then the traversal through boulders was slow enough that I dropped most of the way to the valley's floor. It would have been better to stay on the JMT until at least the next dark elevation line below, to wrap wider around the ridge.
GPS route cutting off JMT to Lake South America

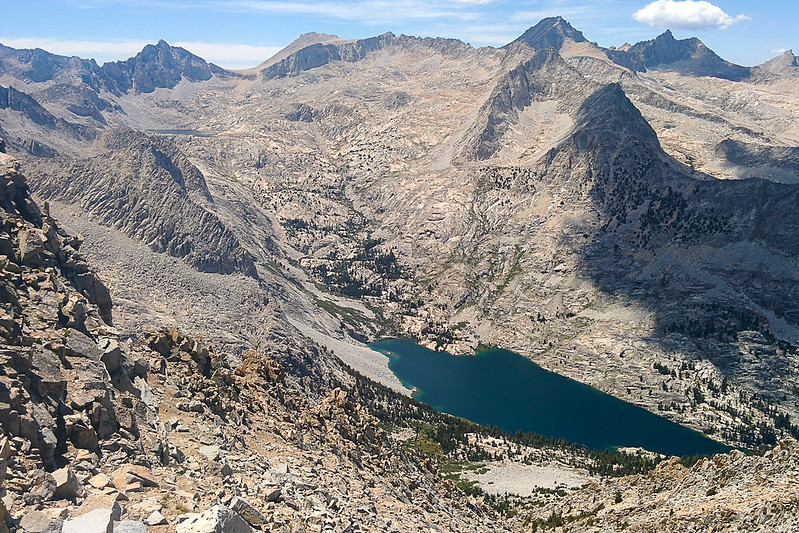
I was hoping to make it to Lake South America for lunch. I beat the clock to hit the ridge at noon, but then realized that the lake was still 5 minutes away. So I jogged down to the next lake, then up to Lake South America. However, I only stopped to refill a water bottle; mosquitoes drove me away. I climbed the next small ridge and found a shadow to sit and eat my lunch in, providing lunch in turn for only one or two bloodsuckers.
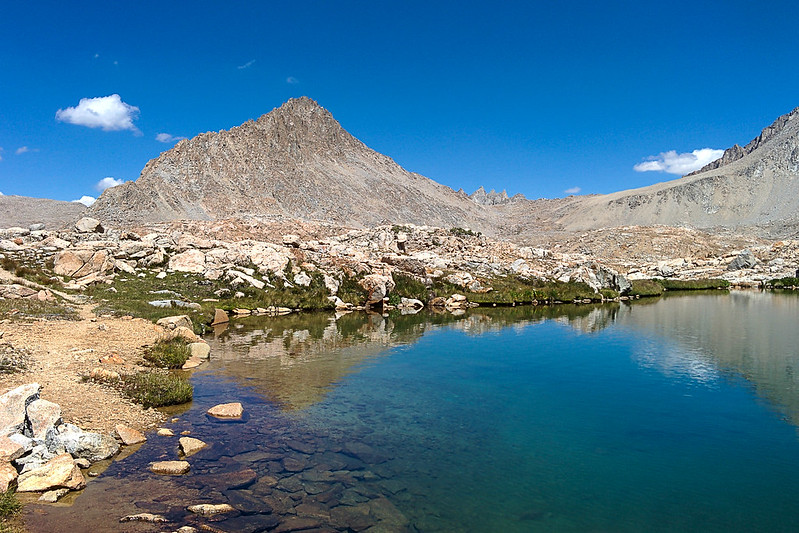
Mt Ericsson and the trail up to Lake South America
Notice the short but steep climb at the end of the valley, also the entirely runnable valley floor, even away from the trail, and the ugly rocks along the valley walls that would make difficult and slow a level traversal from the JMT.

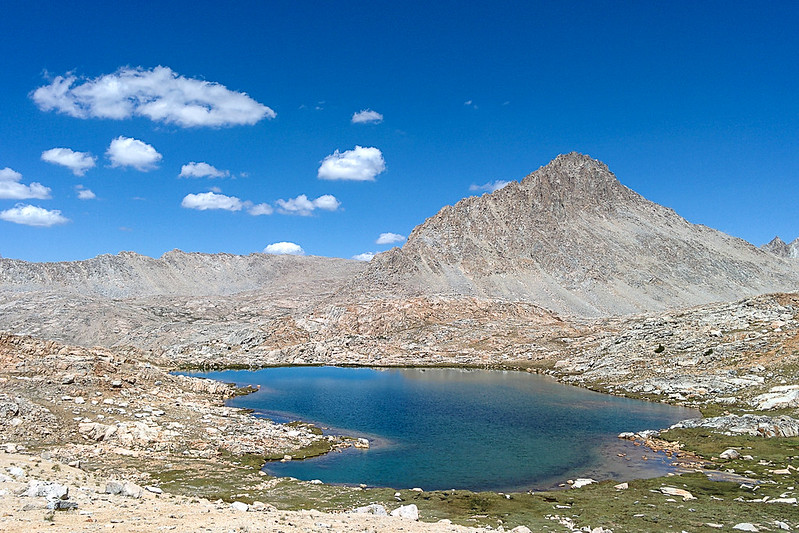
Mount Genevra (left) and Mount Ericsson (right) from ridge above Lake South America
I'm headed for a pass along the ridge in the middle of the photo, where the cloud is.

Closer view

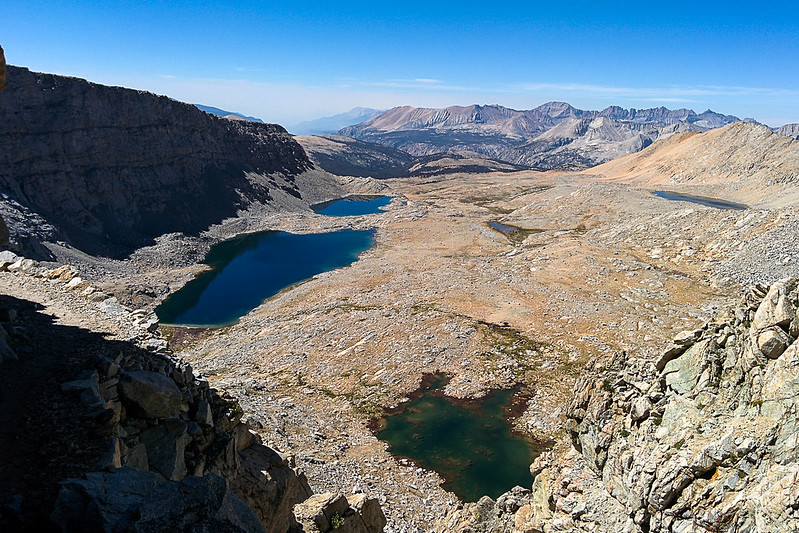
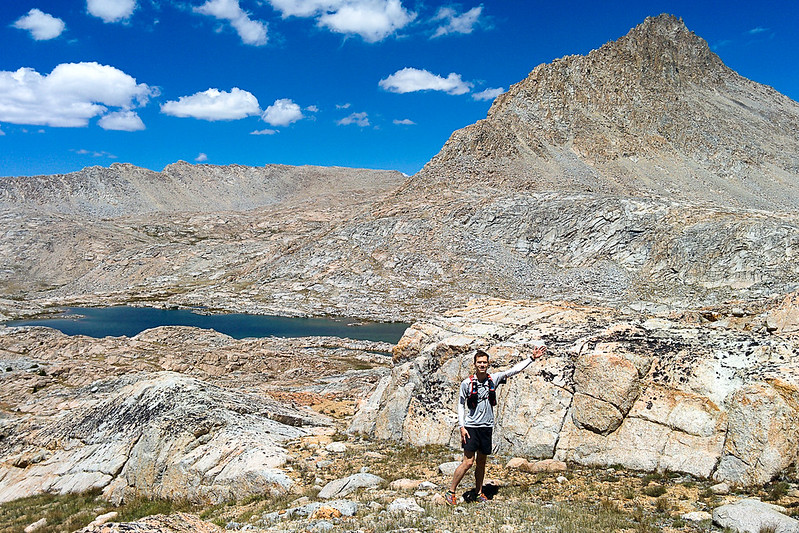
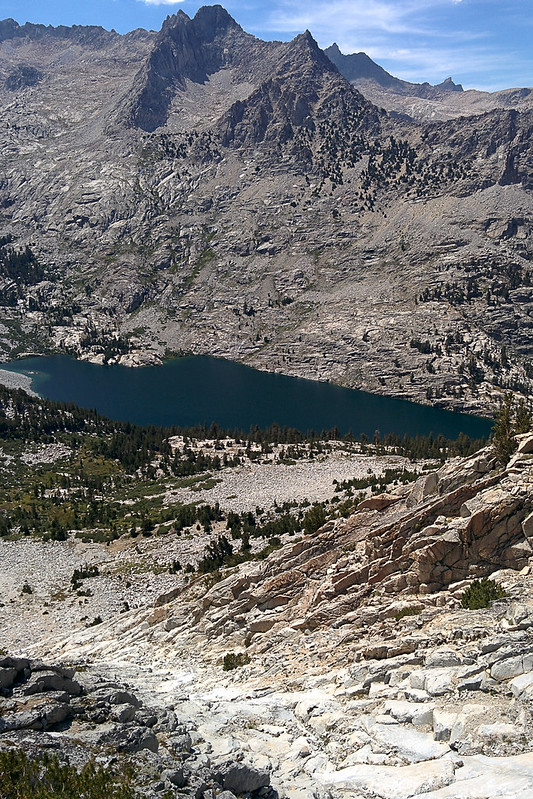
Harrison Pass is to the right of Mount Ericsson, Lake South America is on the way there, just beyond this small lake

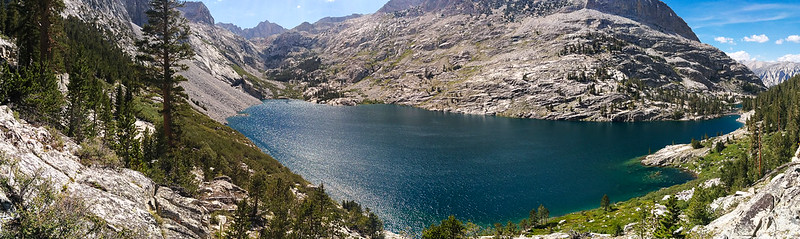
Lake South America—the mosquitoes drove me off!

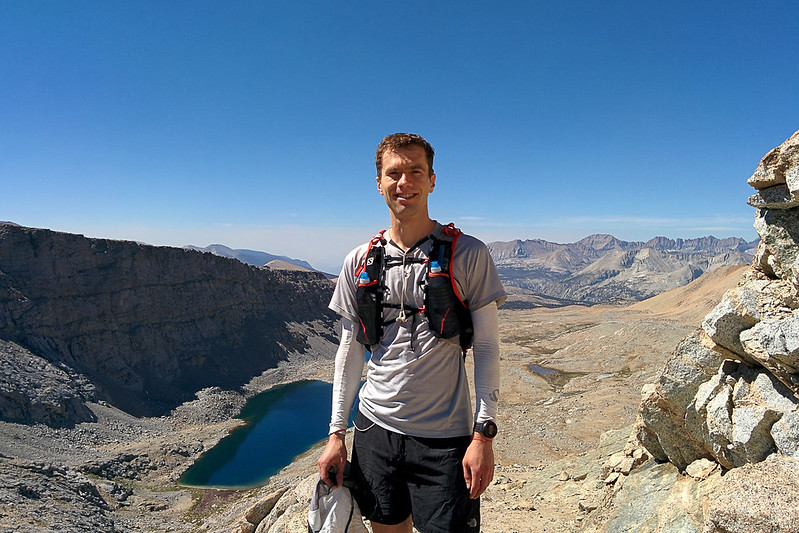
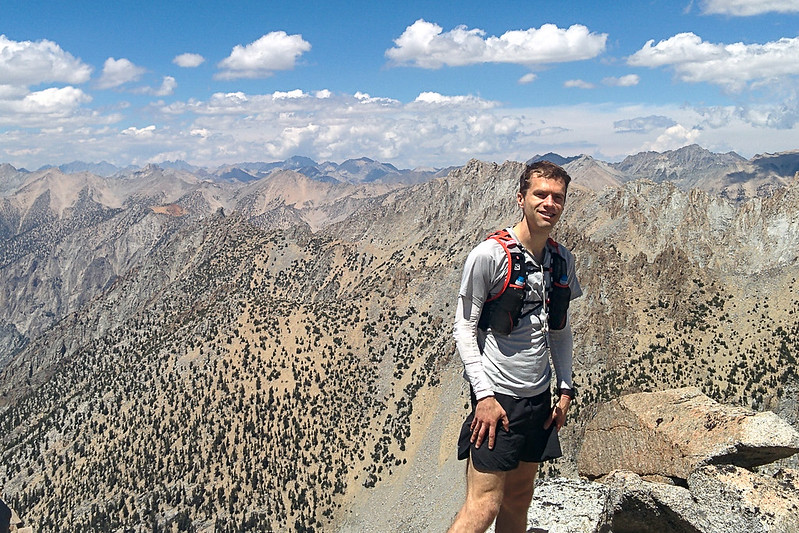
Time for selfies


Better views without me


Going around the next lake


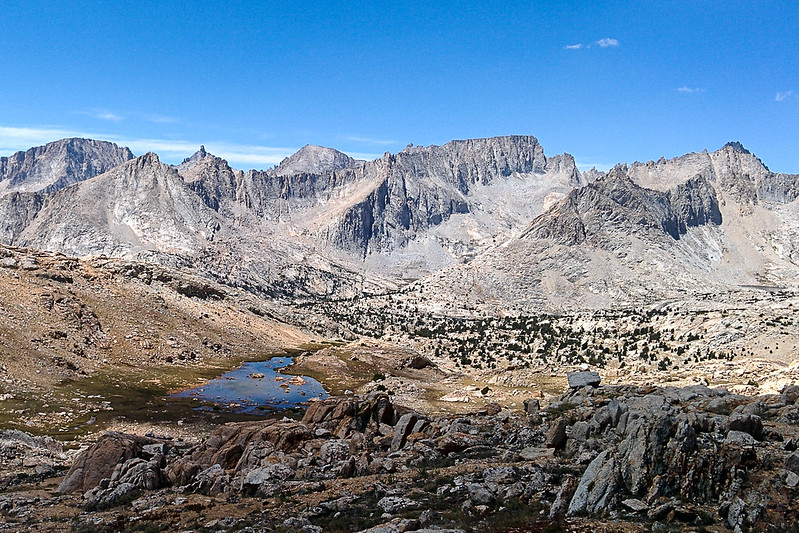
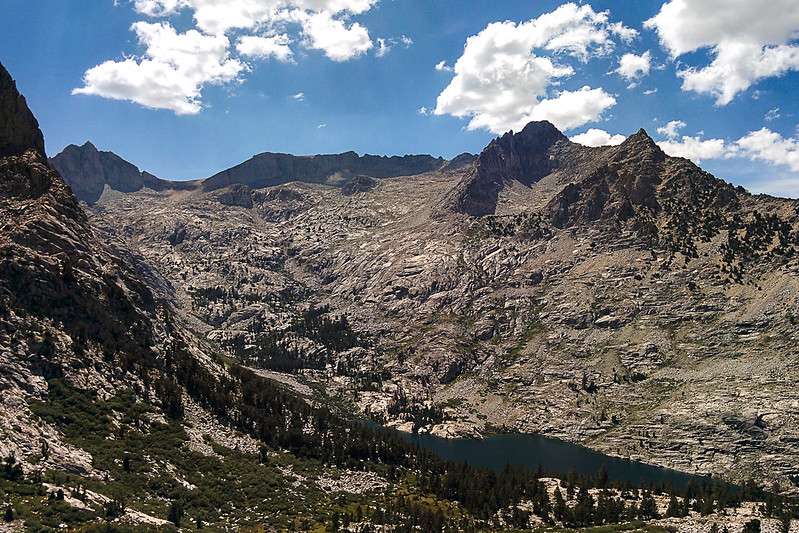
Kern Canyon and Mount Genevra
Milly's Foot Pass is the low spot on the ridge this side of Mount Genevra

Past Lake South America, I really did not know where I was going. I wandered around off trail, often going too high to the right instead of following the easier terrain next to the lakes. I couldn't see the north end of the ridge from Mount Genevra, so didn't know my target. And I wasn't really sure where Little Joe's Pass was, anyway. I decided that my best bet was to go up toward Lucy's Pass (the low point on Ericsson's west ridge, a north-south pass), and then follow the ridge west until hopefully finding Little Joe's. Fortunately, this worked great! Little Joe's really is right at the corner of the ridge, and two cairns marked the entrance. I got there around 2pm.
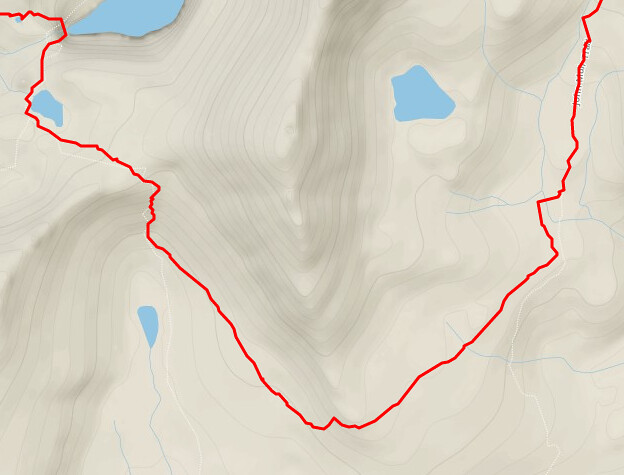
GPS route from Lake South America to Lake Reflection, via Little Joe's Pass

Lucy's Foot Pass

Spectacular views to the north


More selfies
How better to procrastinate going down the chute?

View back toward Mount Whitney
Enough! Time to go down…

Closer view of my route down the pass

There's nothing difficult about the descent down the chute. The rocks are fairly solid, and I never felt unsafe. I used one hand and one trekking pole, switching to two trekking poles from the bottom boulder field to Lake Reflection. However, there's no scree-skiing, and descending along the rocks takes full concentration. All the way down. It is a very, very long way down. I find this mentally tiring, and go through cycles where I slow down more and more, until finally I'm barely inching along a rock, squatting with a hand out—on the same kind of rock that ten minutes earlier I would have strode right past. Catching myself in these cycles, I stopped numerous times to take photos and renew my resolve.
Pics down and up Little Joe's Pass
Cairns mark the entrance to the pass


So far down

That boulder field is the bottom of the pass, but it is still a fair ways (500'?) above the lake


Getting there; I think I traversed one chute to the right around here


The little stone tower at the top is a good landmark


Sharp drop to the shoreline of Lake Reflection

Finally!

At Lake Reflection, I chatted with a fisherman and a camper. The latter told me that there was no trail down to East Lake, and you just have to make your own way. This was worrisome news! In fact, though, there is a trail. It is oddly marked at the top, with random cairns. On the other side of a boulder field, if you can find the trail again, it goes nicely down to East Lake and Bubb's Creek. The trail is higher on the hillside than one might guess, but from the bottom I'd think it should be easy to follow up. It was a little rough, but mostly joggable. With a lot of miles still to go, I felt I should move conservatively to avoid injury. I kept hitting 16:47 mile splits. I wanted to go faster, but then the trail would do something, or I'd get thirsty or hungry. Or, I'd tear my running shorts in half on a tree snag.
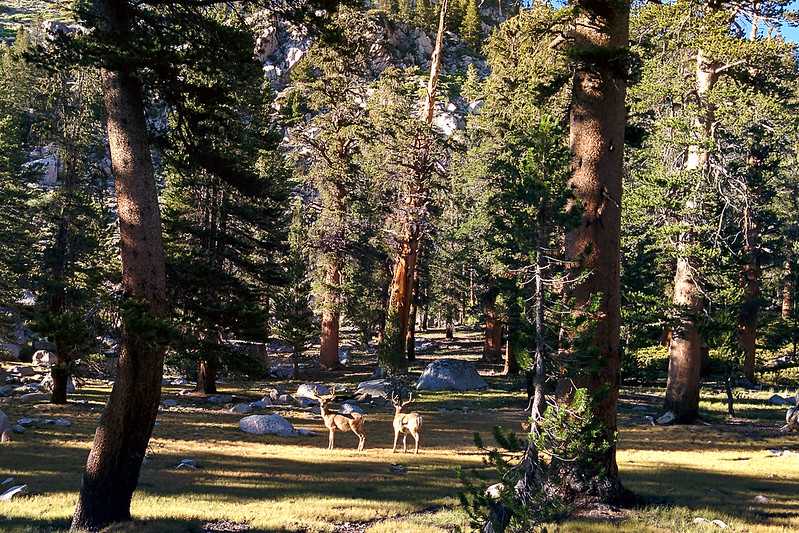
From there, at Junction Meadow at the base of Mount Bago, I was on familiar territory. Just the week before, I'd run from Road's End up to Kearsarge Pass and then hiked Mount Bago. On the way down, I'd gotten drenched by hard rain, but I'd captured plenty of photos going up. Plus, I had run the Rae Lakes loop in 2014. Now I was feeling time pressure. So I resolved to keep moving, without taking pictures.
Deer at Lower Vidette Meadow

So much for resolutions.
It was hot. It's hard to run uphill in the 70s. Despite the fantastic weather I'd enjoyed all day, I complained to myself now. Fortunately, I reasoned, the sun was headed down, and I was headed up. It could only get better!
East Vidette (with Center Peak and Center Basin to the left)

East Vidette, Deerhorn and West Vidette from Bullfrog Lake
Caltopo links: map http://caltopo.com/map.html#ll=36.7662, ... o=r&n=0.25 and simulated view http://caltopo.com/view#ll=36.7727,-118 ... 0.7,-147.3

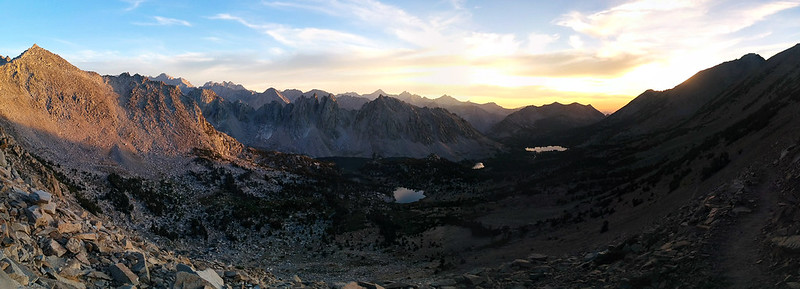
And it did get better. Running late turned out to be a blessing. I got up to Kearsarge Pass as the sun was setting, and the light was spectacular. This is a big advantage of using a high-elevation trailhead. I only wish I could get the same light on a day run on the High Sierra Trail to Precipice Lake.
Clouds above Mount Bago


Finally, approaching Kearsarge Pass (leftmost dip in the ridgeline)

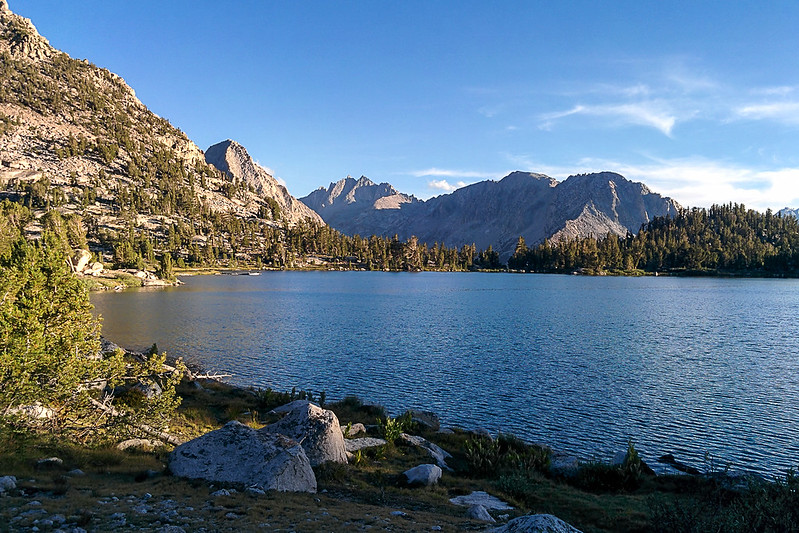
Kearsarge Lakes & Pinnacles


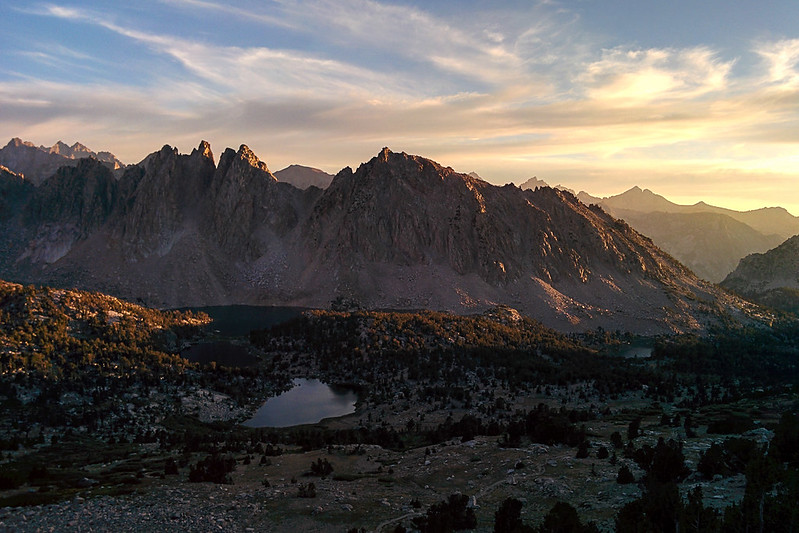
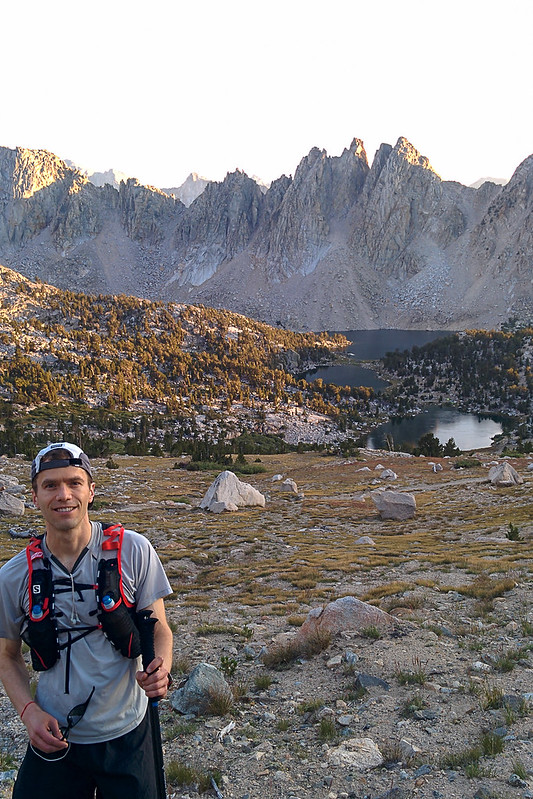
Me, with Kearsarge Lakes & Pinnacles

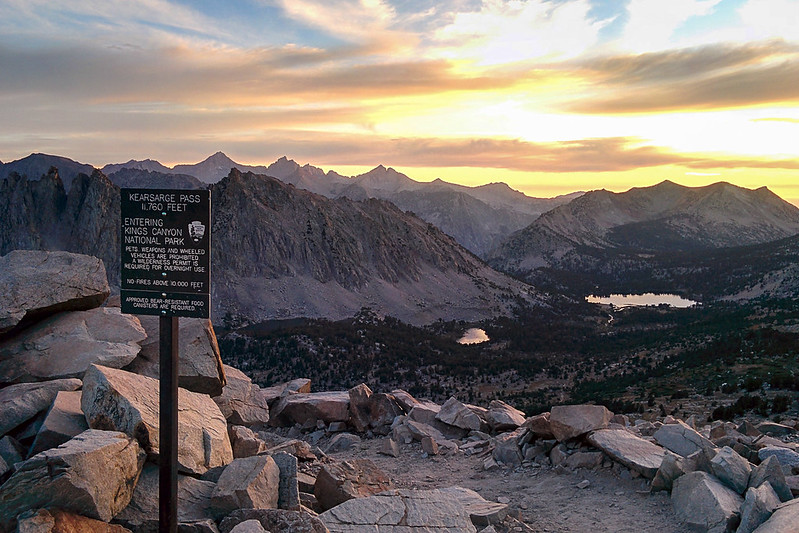
Sunset at Kearsarge Pass

At the pass at around 8pm, I decided to race the last light the final 4.7 (?) miles down to Onion Valley. No more pictures! But I'm weak-willed. That resolution lasted about 30 seconds. University Peak was too colorful not to shoot.
Big Pothole Lake and University Peak

That really was my last photo. (My phone's battery was dying. I stopped Strava and started my GPS running watch.) I put on my headphones, started some music, and tried to get my pace going again. The trail to Kearsarge is known for its excessive switchbacks. True. But, for a runner at the end of a long day, the gentle grade and nearly perfectly smooth trail surface was welcome. I lost my race, and took out my flashlight for the last two miles. Despite the nearly full moon, I had carried the light and two extra sets of batteries for thirty-odd miles. I was pleased to get some use out of them. Below me, the lights of Onion Valley campground beckoned.
And finally I was there, about 8:45pm. I got my food from the (unlocked!) bear locker, grabbed a bite, stretched, washed my feet, changed clothes, and got home by 1am, and was unpacked, unwound, clean and asleep by 2:30. What a weekend! I was so lucky with the weather. Next weekend, though, I might stay home and read a book.
Stats:
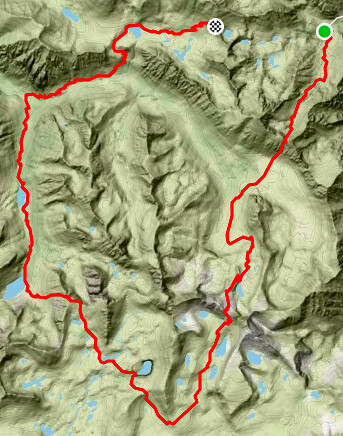
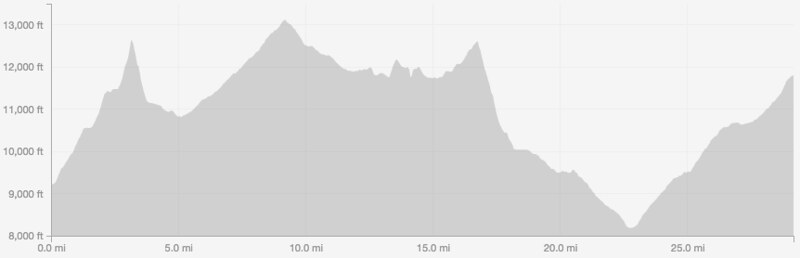
Distance: 33.7 miles (according to Strava, but I'd guess it is more like 34.5 miles)
Elevation: 11,414' (according to Strava, but I'd guess it is 12,000' or possibly 13,000')
Time: 15:30
Approximate distances:
1.4 miles from Onion Valley (9,255') to Lake Robinson (10,560')
1.8 miles, off trail, to University Pass (12,640')
1.9 miles, off trail down through Center Basin to John Muir Trail (at 10,820')
4 miles (9.1 miles total) to Forester Pass (13,153')
2.8 miles down on JMT (to ~11,900')
2.2 miles (14.1 miles total) to Lake South America (~11,700')
3.6 miles, off trail, through Upper Kern Basin to Little Joe's Pass (~12,600')
1.5 miles (18.2 total) down pass to Lake Reflection (~10,050')
4.6 miles (22.8 total), on trail again, down to Junction Meadow (~8,200')
6.3 miles (29.1 total) to Kearsarge Pass (11,709')
4.6 miles (33.7 total) down to Onion Valley
Notes on planning:
The idea for this trip came from Leor Pantilat, who did it in 2009 (brief trip report: https://pantilat.wordpress.com/2009/09/ ... ford-loop/ , detailed report: http://cascadeclimbers.com/forum/ubbthr ... Post910976 , video: https://vimeo.com/6777033 ). At the time, Pantilat wrote, "Despite the substantial and grueling effort that is required to complete this loop, I think it is the greatest single day tour of the Southern Sierras." Most of Pantilat's journeys these days are too intense for me, but this seemed fairly reasonable.
For the approach to the main loop, I considered entering via Road's End, but I'd been there already the previous week and wanted to see Onion Valley. I also considered taking Kearsarge Pass both ways, for a more runnable, though longer, approach. Since my legs are often stiff in the mornings, though, I figured I might as well hike University Pass. Plus, I wanted to see that area.
In the end, I followed Pantilat's route, except I took Little Joe's Pass (also known sometimes as Weyman's Chute) instead of Milly's Foot Pass for the descent from the Upper Kern Basin to Lake Reflection. Weyman's Chute is safer, all class 2, and plenty intense for me. I guess Pantilat probably hadn't heard of it when he was planning the route.
Pantilat took 13:45 to complete the loop. I took 15:30. Good, in my opinion!
I think Pantilat overestimates the distance and elevation. He calls it, "nearly 40 miles and 14,000 feet of elevation gain." My Strava route calls it 11,414' elevation gain & loss, over 33.7 miles. I think the actual distance is closer to 35 miles, and the elevation gain could be as much as 13,000', but I don't think it is 14,000'.
Nutrition and water:
I ate 4 Gus (with 4 left over), and 7 Clif bars (with one left over). I made a note that the Coconut Chocolate Chip Clif bar tastes terrible!
I drank 8 servings of energy mix (1L premixed, 1 bag of 4 servings), with 1 bag left over.
Total = 4*100 + 7*245 + 8*70 = 2675 calories.
I drank 3.5L of water & energy drink total. Starting with 1L of energy mix, I refilled just before cutting off trail to Lake South America (treating with iodine), again at Lake South America, at Bubb's Creek, and at Bullfrog Lake. But then I dumped out both bottles (1L) from Bullfrog Lake, rather than carry it down from Kearsarge Pass.
Gear:
I traveled heavy, including lots of extra nutrition, an extra pair of socks, trekking poles, jacket and my other emergency gear. Once again, the Saucony Kinvara TR2s worked great.

